Install A Cantilever Gate
We have provided the following installation instructions to help make the installation of your cantilever gate system as easy as possible. It is important to have the correct length of both the counterbalance and the spacing between the carriages of the gate system. Also critical is the size of the foundation. Before starting your project, we recommend you completely read the cantilever gate installation instructions. Click on the button below to download your own copy of the instructions, allowing you to print a copy for quick reference or take them with you as you begin the installation process.
Download Installation Instructions
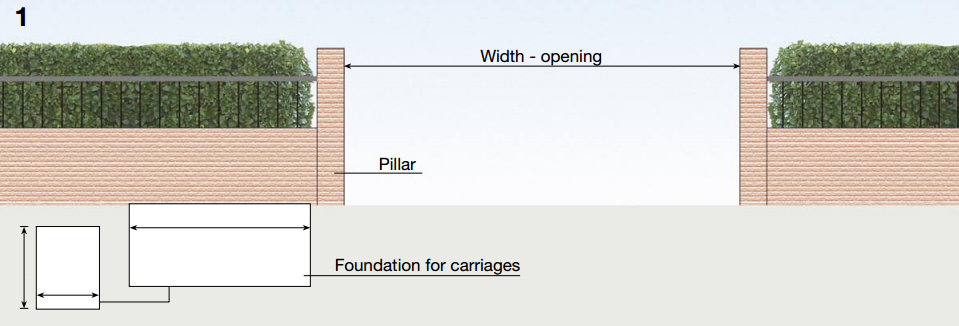
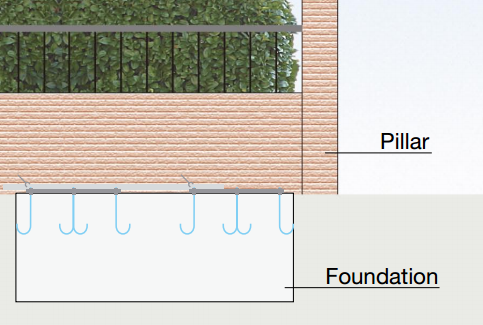
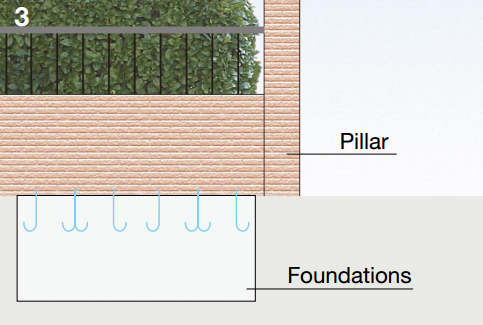
1 - Prepare the foundation where the carriage set will be installed at.
a - Correctly dimension the foundations where the system will be installed while considering the weight and the length of the gate that will be installed.
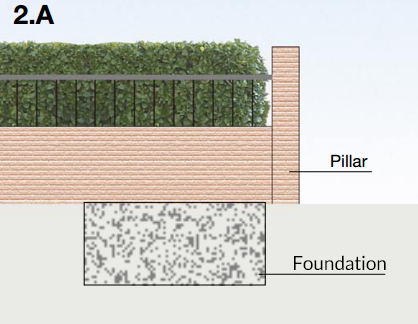
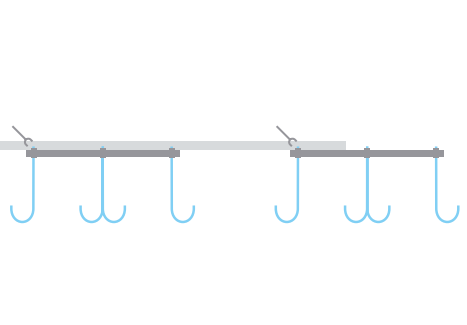
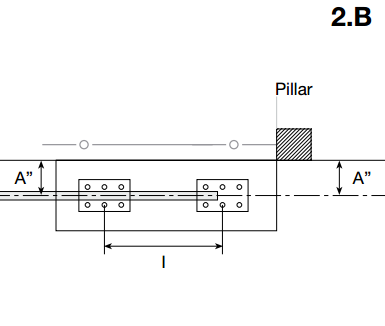
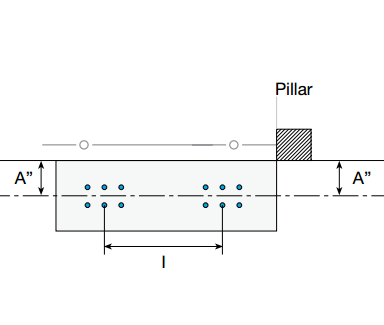
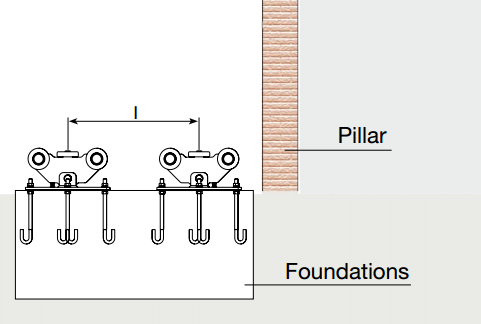
2A - Positioning of the tie rods using the centering template provided.
a - Once the foundation has been laid, fill the hole with cement until all of the excavation is covered.
b - Block the tie rods on the plates of the templates, as shown in the drawing, fixing the nuts provided with a spanner.
c - Determine the center-to-center distance of the carriages.
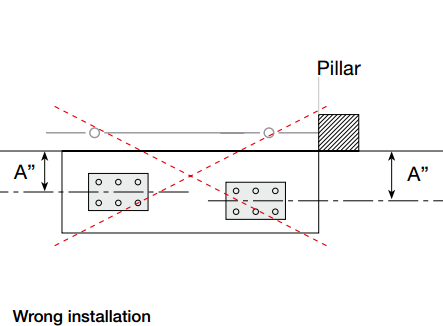
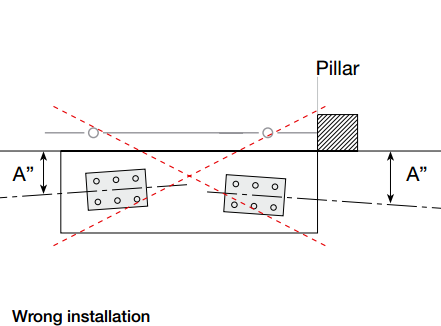
d - Sink your tie rods into the foundation while respecting the position measures both from the enclosure and from the pillar where the gate guide plate will be fixed. Above all, ensure that the axis of the carriages is parallel with the axis of the enclosure.
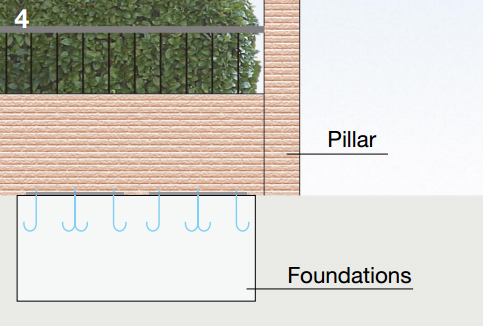
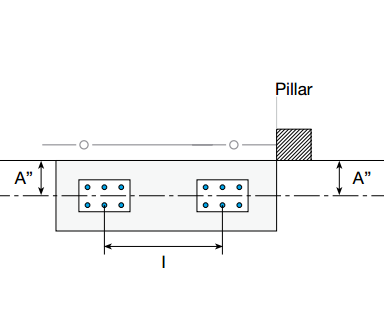
The following two images are examples of incorrect installation.
3 - Wait about 24 hours or until the foundations are perfectly set.
a - Once verified that the foundations are well hardened, loosen off the nuts of the tie rods, clean the area where the counter plates rest, and prepare the accessories and remaining parts for the assembly of the carriages.
4 - Position the counter plate.
a - Once the surface has been cleaned, position the counter plate inside the holes that can be adjusted to the tie rods previously fixed into the cement.
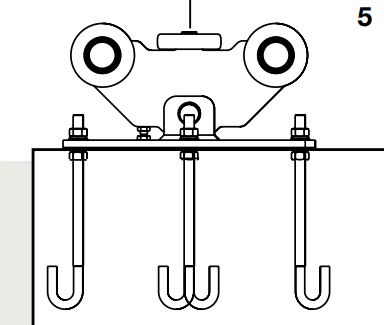
5 - Position your carriages inside the tie rods, making sure that the two regulating screws positioned under the carriage's body are facing towards the outside of the carriage. Afterward, fix the base of the carriages with special nuts.
a - Position the carriages inside of the tie rods so that they rest correctly on the surface of the two counter plates, ensuring that the regulation screws (which are positioned under the main body of the carriage) are turned to the right side for the front of the carriage, and to the left side for the back carriage.
b - Ensure that before you tighten the nuts of the tie rods, the elastic washer is between the nuts and the carriage plate; the nuts can be tightened.
c - Use the screws on the carriage plate to fasten the plate until it is completely flat to guarantee the gate's correct functioning.
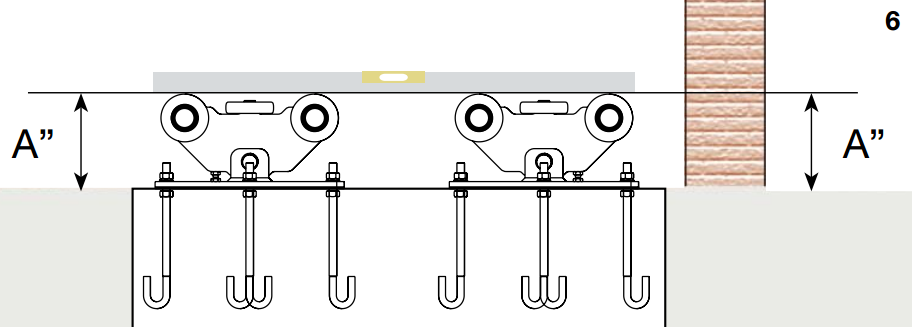
6 - For this step, ensure that all the carriages are at the same height as the plate.
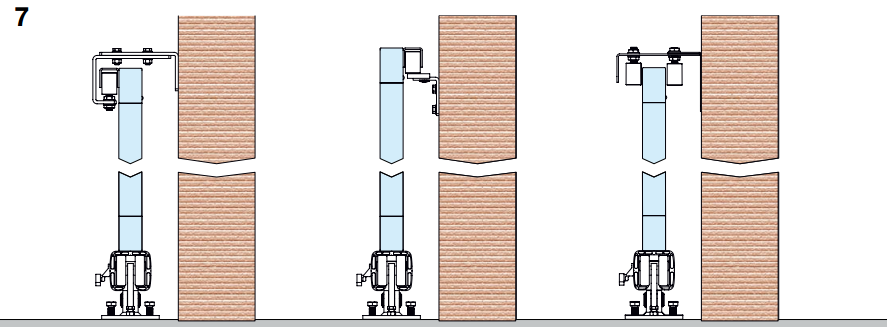
7 - Fix the gate guide plate to the pillar according to individual requirements.
a - According to the needs of both location and gate type, ensure that the gate guide plate has been fixed to the pillar, checking the firm hold of the pillar and the correct assembly of all parts of the plate.
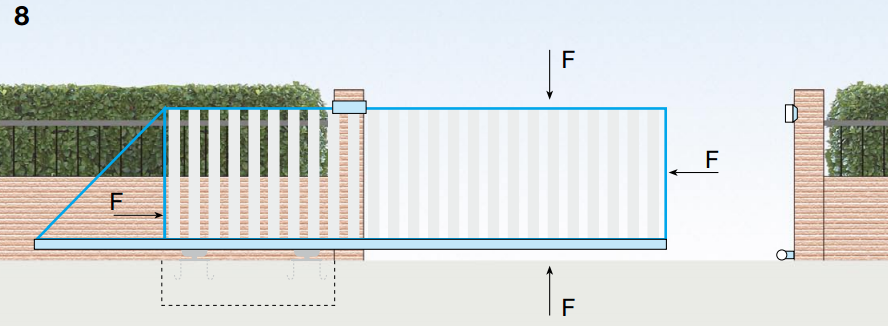
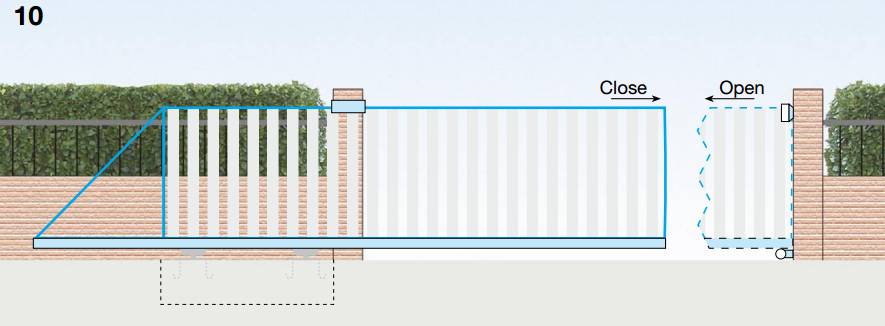
8 - Test the gate by carrying out a series of manual maneuvers.
a - Once you have checked that all the nuts have been correctly tightened, carry out some manual gate operations to ensure its functioning based on the different types of accessories used.
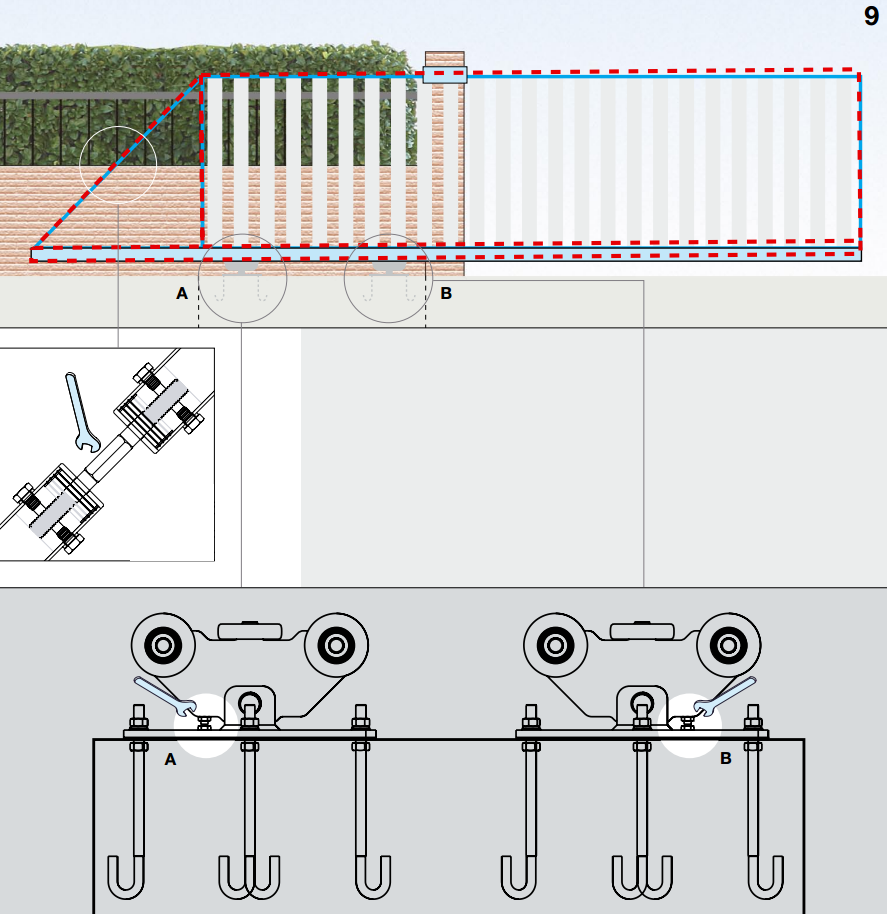
9 - In case your gate needs to be set after having been installed, act on the adjustment screws placed under the body of the carriage until the gate is correctly set.